
Guest Bathroom Makeover
I'm so excited to share my recent guest bathroom makeover. This is the first project I did almost entirely by myself while my husband was out of town for work (for three weeks, with no access to his phone. I really needed something to keep me busy).
I couldn't be happier or more proud of how it turned out.
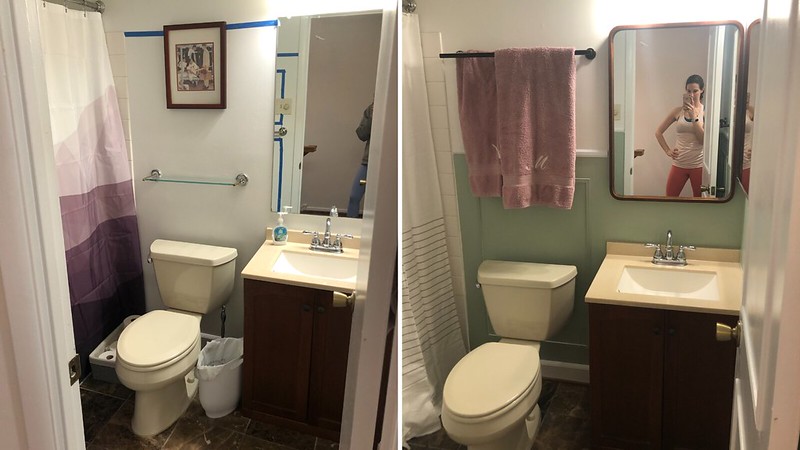
I should start by saying there was nothing actually wrong with our guest bathroom. In fact, we're pretty sure at some point the previous owners may have installed new flooring and new vanity.
But a lot of things were still builder grade quality. The mirror, the light, the towel bars, etc.
I wanted to give this space a makeover to freshen it up and make it a bit more modern.
I envisioned adding all new fixtures and some trim work to give things a bit of texture and some color.

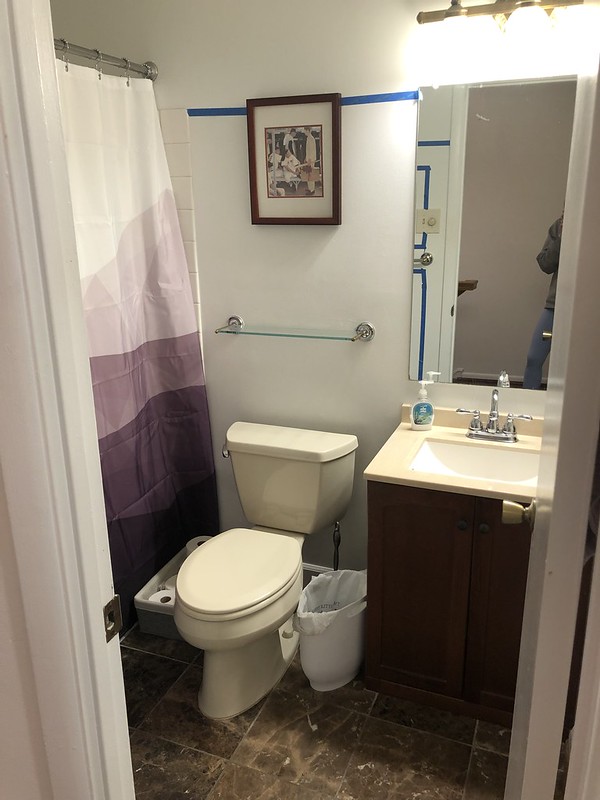
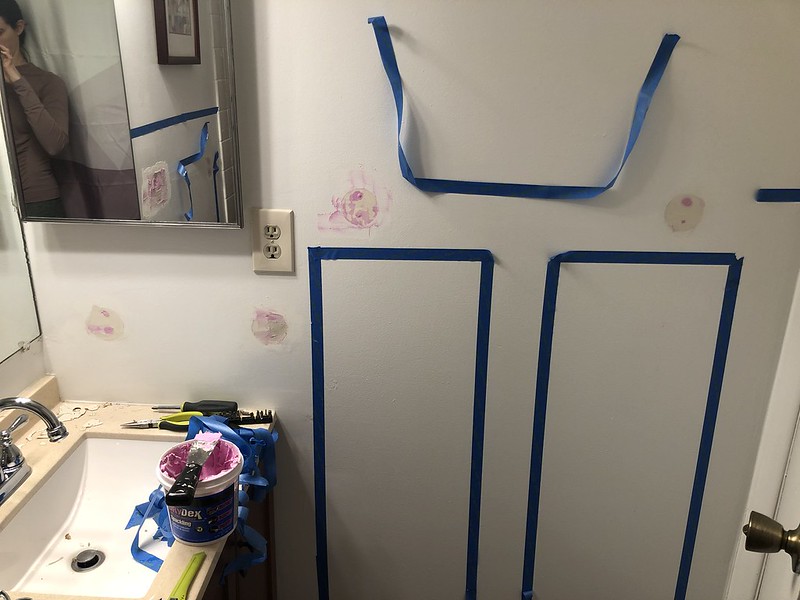
I started mapping things out with painters tape so that I could get an idea of what different layouts might look at. This was honestly the part that took me the longest. I played with so many different configurations before I settled on my final design.

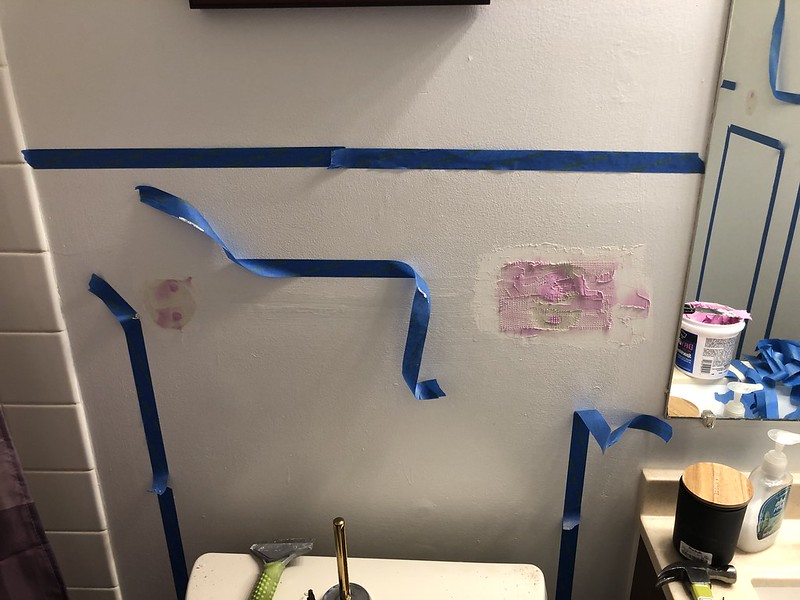
I started demolition the Friday before my husband left. I ripped out ugly towel bars and funny shelves. Some came off the wall very easily. Some did not, and I ended up with some decent size holes that I needed to patch.

My husband helped me take the original mirror off the wall because I needed an extra set of hands so it didn't fall and shatter all over the floor.
With that, I had a nice blank space to work with.
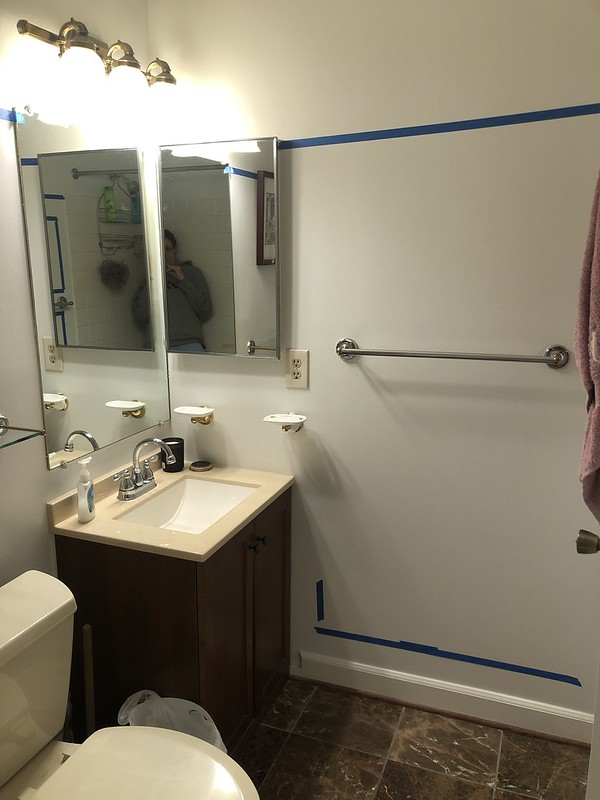
I patched the holes in the walls. This required several rounds of spackle and an actual patch on one of the bigger holes. Major thanks to our friends who let me borrow their sander, which saved me so much time during the wall repair part of this project.
With wall repair underway, I headed to the hardware store to get the rest of the supplies I'd need.
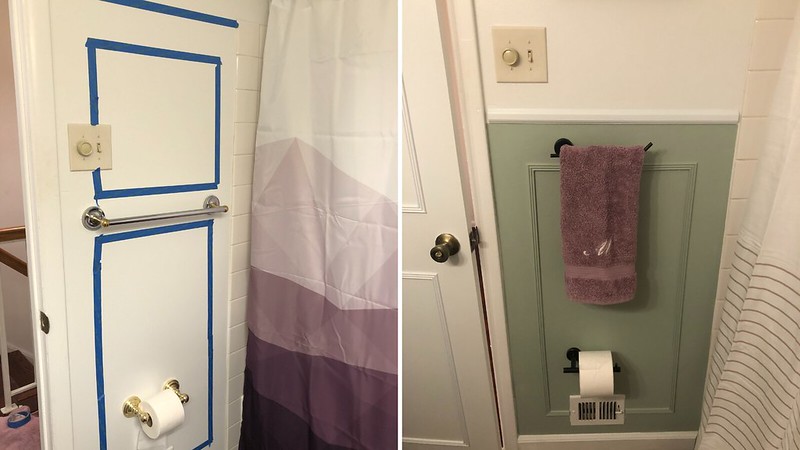
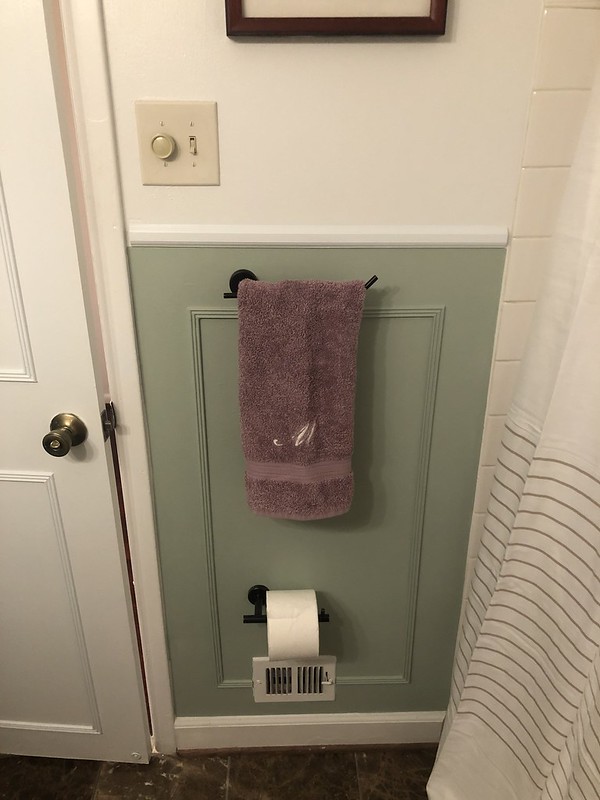
For the picture frame boxes I wanted to add, I used the same trim I'd selected for our door makeover.
I also wanted to add a chair rail, and I spent some time trying to decide which style trim would work best. I ultimately decided on something that was about two inches tall and only about an inch wide so that it didn't overpower the picture frame trim.
I got all the wood cut down, which admittedly took some time, and then it was time to hang it.
I was a little nervous about this part because I always had help doing any sort of trim or wood accent walls, and I was worried I wouldn't have enough hands to hold the nail gun and the level and make it all work. But it ended up going just fine.

Once or twice I had to pull a piece off the wall and re-nail it because I didn't have it perfectly level, but overall, getting the trim hung wasn't too bad.

Then I needed to fill the nail holes with wood filler and caulk all the seams.
After I had the trim up, I had to pick out a paint color. I was unimpressed with the first three color samples I got. They ended up not looking much like the swatches, so I picked up three more before finding my winner.

I went with Antique Jade by Benjamin Moore. After priming all the wood, I gave everything one coat of the paint.


I followed it up with a second coat the next day, and I just love the way the color turned out. It was the perfect match for the earth tones already in the bathroom.

The last few things were just hanging the new fixtures.
When my parents were in town, I got my dad to help me change the light fixture. It was one of those tasks were I thought I just needed an extra set of hands. But my dad actually showed me a way to get the light to suspend so that a single person can do all the wiring themselves. It's a trick that I will keep in mind for future projects.

I went with a light from Amazon. I had actually ordered it for a different room a few years ago, but it ended up not fitting in that space. I had returned it at the time, and was excited when it was still being sold since it fit pretty perfectly in this room.
The last thing I installed was all the new bathroom hardware. I went with an oil-rubbed bronze finish. There's just something about that finish that I love, and I thought it nicely complimented the rest of the room.

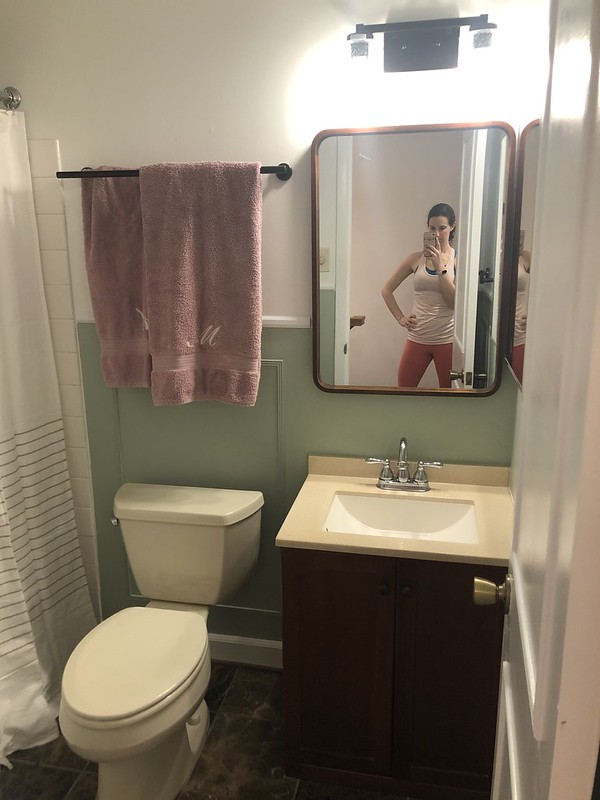
And that was it! Fresh trim, paint and all new fixtures, and this space looks so much cozier.
I love the way it looks, and that I did it basically all on my own.


0 comments